

")
Introduction:
In Data Analytics, there are many instances when you have to perform a specific task multiple times, and that too, using the same tools. Therefore, it is important to find a solution for this repeated workflow and bring the set of repeated tasks under a single instruction. In this article, we will learn about one such solution- Alteryx Macros, which is used to automate repeated tasks in Alteryx, a popular Analytics platform. But before we learn about the Alteryx Macros let us have a brief introduction to Alteryx.
What is Alteryx?
Alteryx is a self-service Data Analytics platform using which data professionals can leverage the modern Data Analytics Workflow. It is used as a Data Preparation and Analytics Solution that assists organizations in blending, transforming, and processing data from different sources using an easy-to-use, drag-and-drop interface.
What is a Macro in Alteryx?
An Alteryx Macro is a group of tools that is combined into a single tool to be inserted into another workflow. It is used to save and automate an analytic process that is performed repeatedly in Data Analytics. With Macro, you do not need to recreate the analytic process each time in the workflow.
A Macro consists of a workflow and a user interface created using Interface Tools or an HTML-GUI Library tool. Alteryx Macros are saved as a separate file with the ‘.yxmc’ extension and then shared with the workflows or procedures to be executed. In addition to creating the Macros from scratch, we can also convert a workflow or a part of the workflow into an Alteryx Macro.
Benefits of Alteryx Macro
- It incorporates reusability
Using Macros, you can encapsulate a single tool or a group of tools into a single Tool so that it can be used across multiple workflows.
- It simplifies the workflow
The workflows that are larger and more complex become simpler with the use of Macros in Alteryx.
- It makes the Analytics Process faster
Macros help us to reduce the time consumed in manually updating the data into the Excel sheet. Thus, the analytics process becomes faster
- It enhances adaptability in the Workflow
Macros can be parametrized which enables us to change the inputs and outputs as per the specific needs. Therefore, the workflow becomes more flexible.
- It facilitates advanced Analytics
Alteryx Macros can be used to perform complex predictive modeling on different data sets to make the Analytics at a higher level.
Types of Alteryx Macros
- Standard Macro
This Macro is primarily used to package a process in a workflow as a tool that can be inserted into a workflow.
- Batch Macro
Batch Macro can be executed multiple times in a workflow and it creates an output after each execution. It requires a Control Parameter tool as an input and it runs once for each record or a selected group of records in data. There can be multiple Control Parameter Tools associated with the Batch Macro.
- Iterative Macro
This Macro follows a loop execution. It means that it is executed in the workflow a particular number of times set in configuration or continuously until a condition is satisfied. The Iterative macro properties only appear on the Test tab in the Interface Designer but the contents of the Test tab cannot be edited from the Interface Designer.
- Location Optimizer Macro
The Location Optimizer Macro is a macro that runs in multiple iterations to determine the best locations. It is also used to add or remove a location from a location network. The number of locations that you want to add to the network can be specified along with the optimization level.
How to Create an Alteryx Macro?
Follow the below steps to create Alteryx Macro. Here, we are creating a Standard Macro in our Analytics Workflow.
- Step 1: Open your Alteryx Designer Desktop Window and create the workflow in the Alteryx Designer as shown below. Here, we have created a simple workflow of adding 7 to the input field.

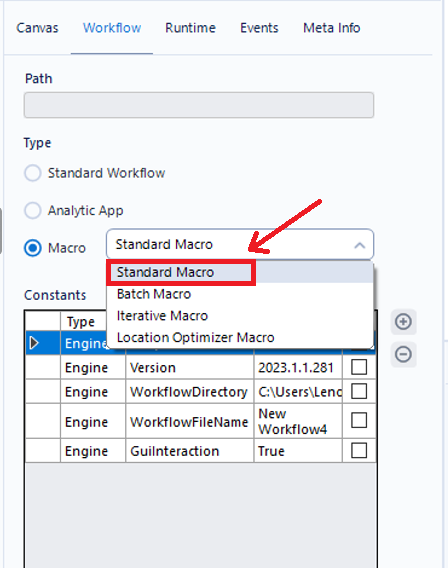
- Step 2: Choose the Standard Macro option in the Workflow Configuration tab as outlined below:
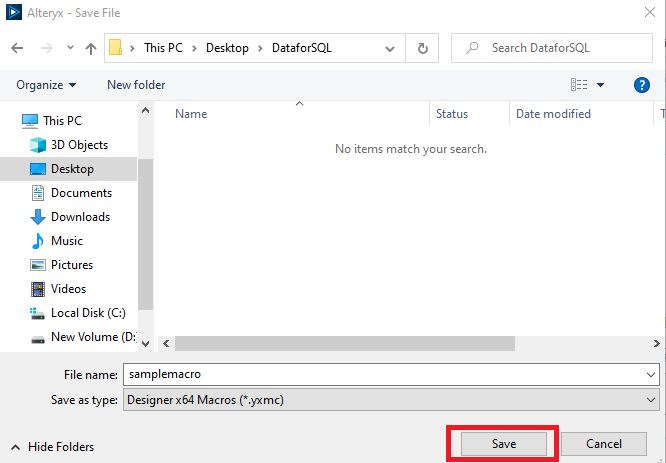
- Step 3: Now save the workflow as Standard Macro in the folder where you want to save.
- Step 4: Now, to use a particular Macro you have to insert it in your workflow. Open a new workflow and then right-click to insert the macro in your workflow as shown below:
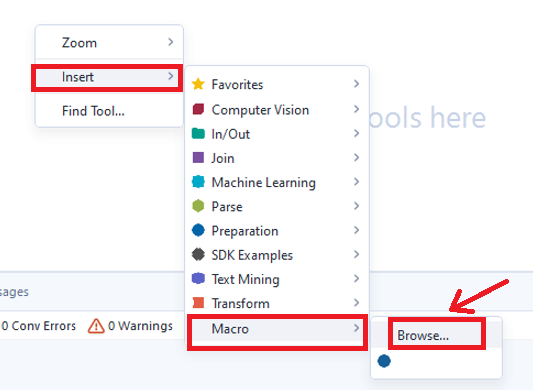
- Step 5: Choose the desired macro file with the ‘.yxmc’ extension in the folder.

- Step 6: The Macro has been inserted in your workflow and is ready to be used with your current workflow or procedure as demonstrated below:

How to convert Workflow into Alteryx Macro?
In Alteryx training, you will learn converting an existing workflow or a part of it into a Macro Tool. For converting, your existing workflow should be saved in the system. Follow the below steps to convert a workflow into a macro.
- Step 1: If you want to select a single tool in the macro, right-click on it. To select multiple tools, drag the mouse to multiple Tools. Then, right-click on any one of the tools and select the ‘Convert to Macro’ option as shown below.

- Step 2: Select the icon for your Macro and then click on the three dots to select the location where you want to save your Macro as outlined below:

- Step 3: Type the desired name for your Macro and click on the save button.

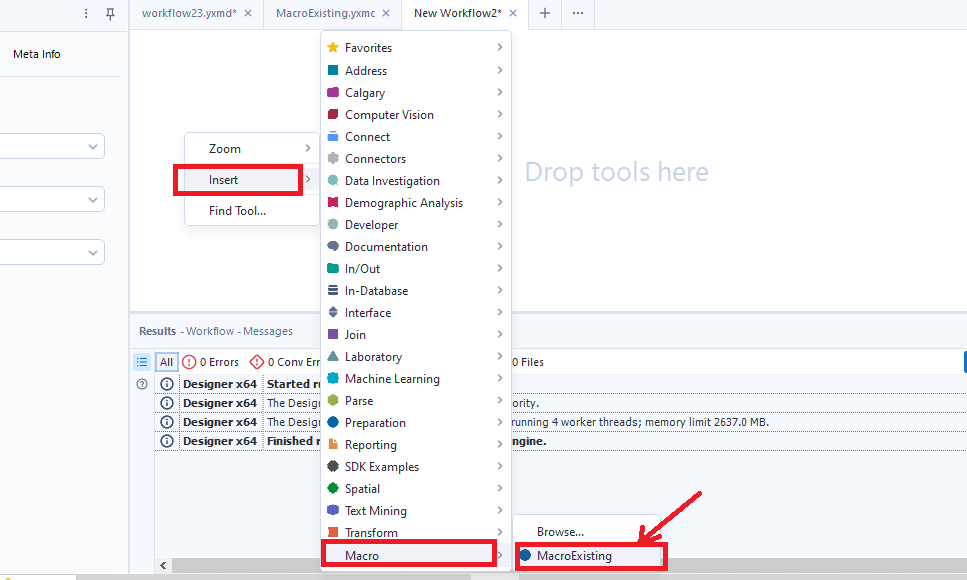
- Step 4: Your Macro has been saved now. Right-click on the new workflow window to insert the macro tool and choose the recent Macro Tool that you saved as demonstrated below:
- Step 5: Click on the Macro Tool to select it and then click on the Run Button in the upper-right corner. The output console shows the output of the Macro as depicted below:

How to create a Macro Repository?
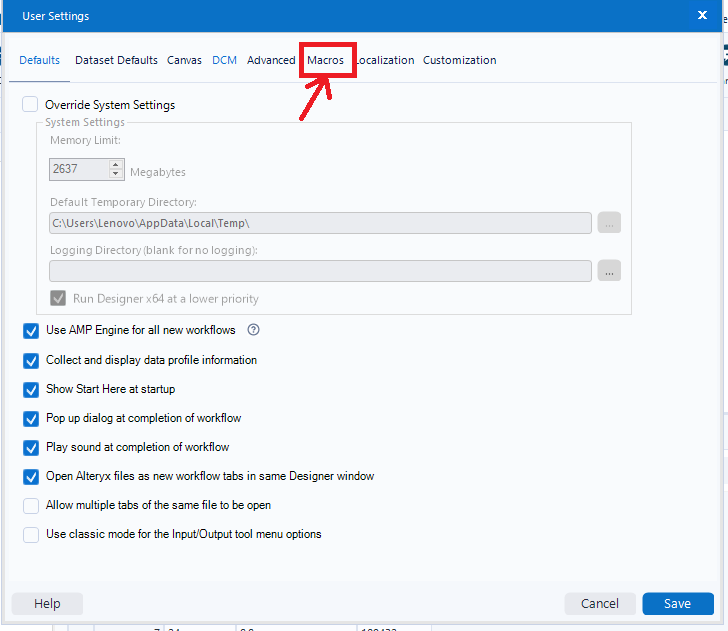
- Step 1: Click on the ‘Options’ in the menu and then click on the User Settings Dropdown. Then, click on the ‘edit user settings’ option as shown below:

- Step 2: Navigate to the Macros Option to open the Macros Repository Tab.
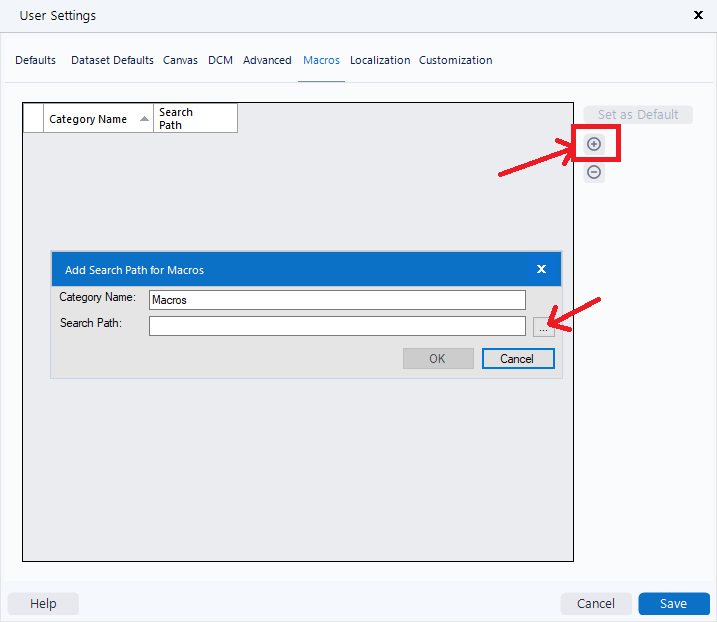
- Step 3: Click on the ‘+’ button to create a Macro Repository and click on the three dots to select the path of the Folder where the Macro Tools have been stored as outlined below:
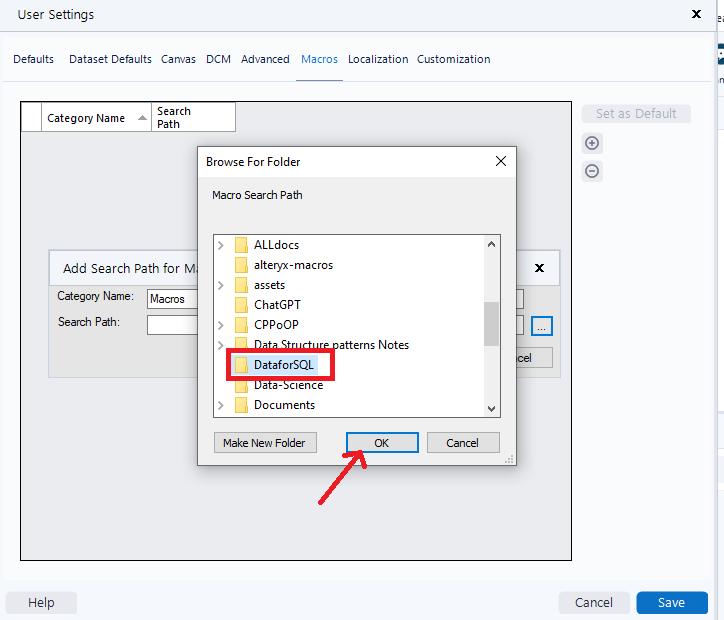
- Step 4: Select the desired folder from your system and click on the ‘OK’ button.
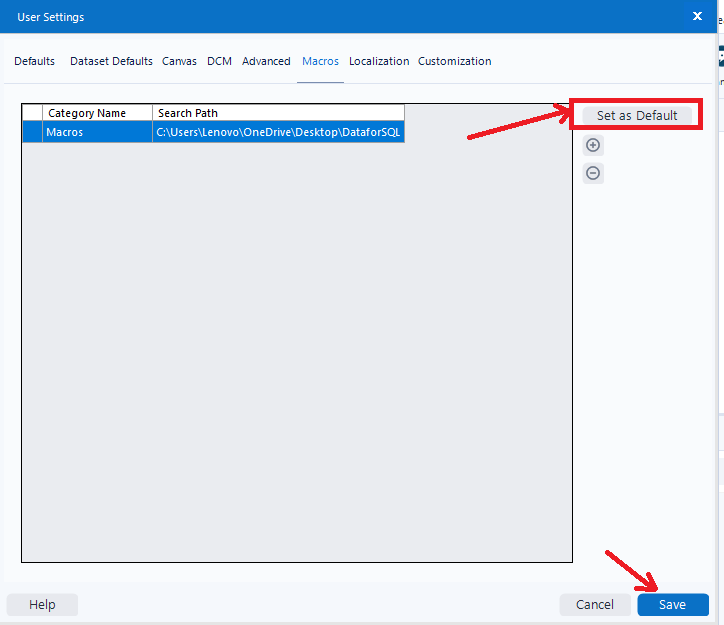
- Step 5: The location of the Macros Folder appears on the ‘search path’ option as shown below:
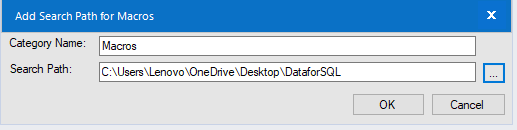
- Step 6: After this, you can set the Macro Repository Default by clicking on the ‘set as default’ option and then clicking on the ‘save’ button. The Macro Repository has been successfully saved.
Conclusion
Macros in Alteryx are the Tools that have repetitive tasks needed while processing the data across different sources or platforms. To automate the Data Analytics Procedures, Alteryx Macros are of great importance as they unify all the tools or steps that are repeated into a single tool that can be reused again and again.
This saves time and accelerates the Analytics Cycle, boosting overall productivity. With the above steps, you have clearly understood building and using the Alteryx Macros, and you are ready to reduce the overhead of repetitive tasks in your Data Analytics Workflow.

